V2 - Deploying Ghost Blog to Azure Linux App Service using MySql, SendGrid, Azure Storage, CloudFlare CDN & Disqus

A few months ago, I deployed my blog using Ghost however I came upon many issues when trying to host it on Azure by following other tutorials available on the web. Just to get up and running, I used the Ghost docker image and then just wired up my configuration via the App Configuration in Azure. As a result, this meant that I had no control over my theme which meant I couldn't add Disqus to allow people to comment, I couldn't serve my traffic through a CDN because I wasn't able to specify a custom storage adapter and the list goes on. It's fair to say I was not happy with the integration in the slightest.
So, because I am a curious developer and am somewhat a perfectionist, I opted for a custom configuration. This lead me to go figure it all out my self, for example, building and pushing a docker image whilst extending the Ghost docker image, figuring out how to get the JSON configuration working (a lot of trial and error), working out how to serve my images through a cost effective CDN, working out how to save and serve images via Azure Blob Storage and much more. Below i will go through what you will need to setup your own Ghost blog.
Oh and a quick note, you may be wondering how much this all costs in total. The app service instance costs £10 per month. The MySql Database, for the lowest tier, costs £7 and the cost of the Storage Account is less than 50p a month for the storage that I use. I already had a app service instance so it effectively the only thing that I was paying for was the database. I would highly recommend to just pay for the Ghost hosted service because you receive an excellent product and at the same time you are supporting the development of an open source project and not to mention it's a lot less hassle. However if you are up for a challenge or just prefer to host your own "stuff" then please follow the steps below.
Pre-requisites
- Clone this repo
- Make sure docker is installed
- Make sure node is installed
- Make sure you have an Azure account
- Make sure you have a SendGrid account
- Domain name hosted on Cloudflare. They are now a registrar for a few TLDs, so you can transfer your domains to them or you can just update the name servers on your current provider.
Deployment
First we need to deploy the resources to be able to run our Ghost blog. We need an App Service, MySQL database and an Azure Storage account. For now we will only setup the MySQL database and Storage Account.
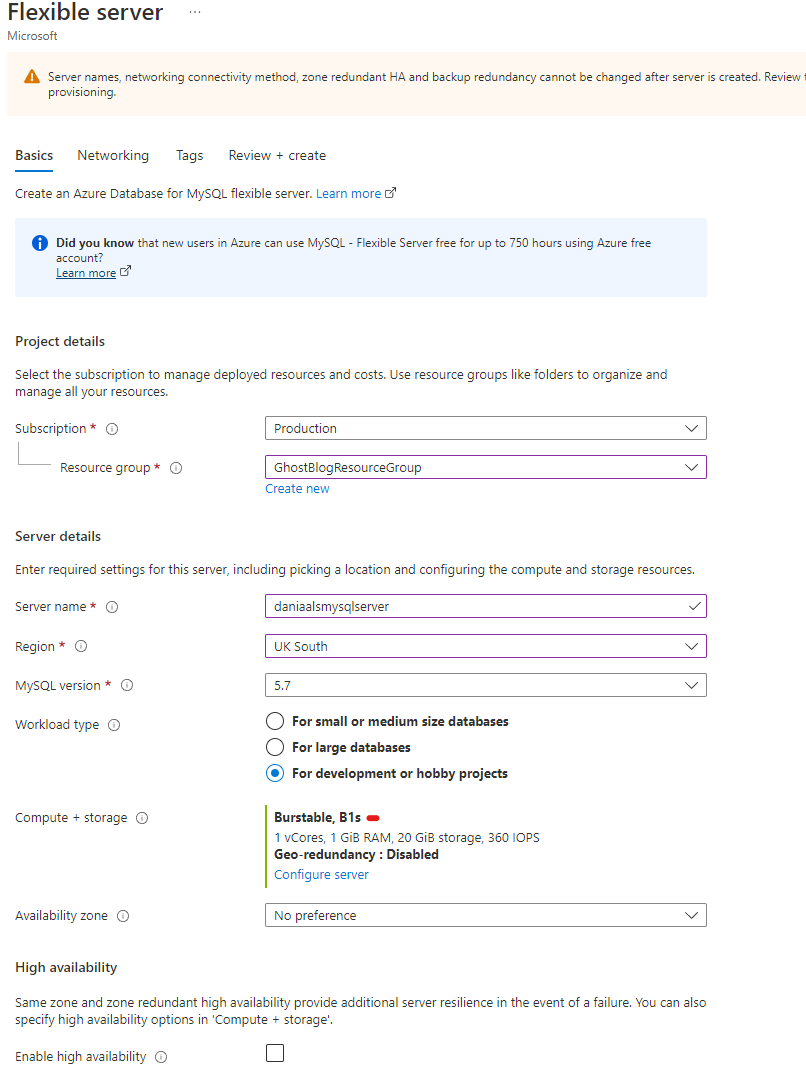
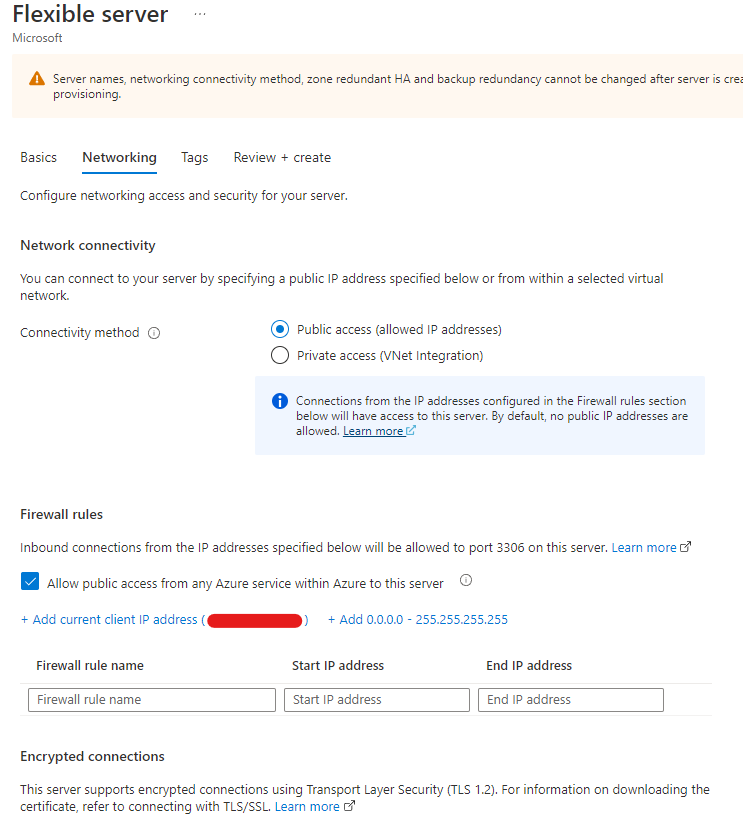
1. Azure Database for MySQL flexible server. Now we need to create out MySQL database. I opted to host mine on Azure because their lowest tier is ~£7 but you can use Digital Ocean, AWS, GCP or any other cloud platform that has the MySQL database hosting. Make sure you select the cheapest instance which is a Burstable B1s. On the networking tab, make sure you select "Allow public access from any Azure service within Azure to this server". Once you have configured your MySQL database, click "Review + Create".
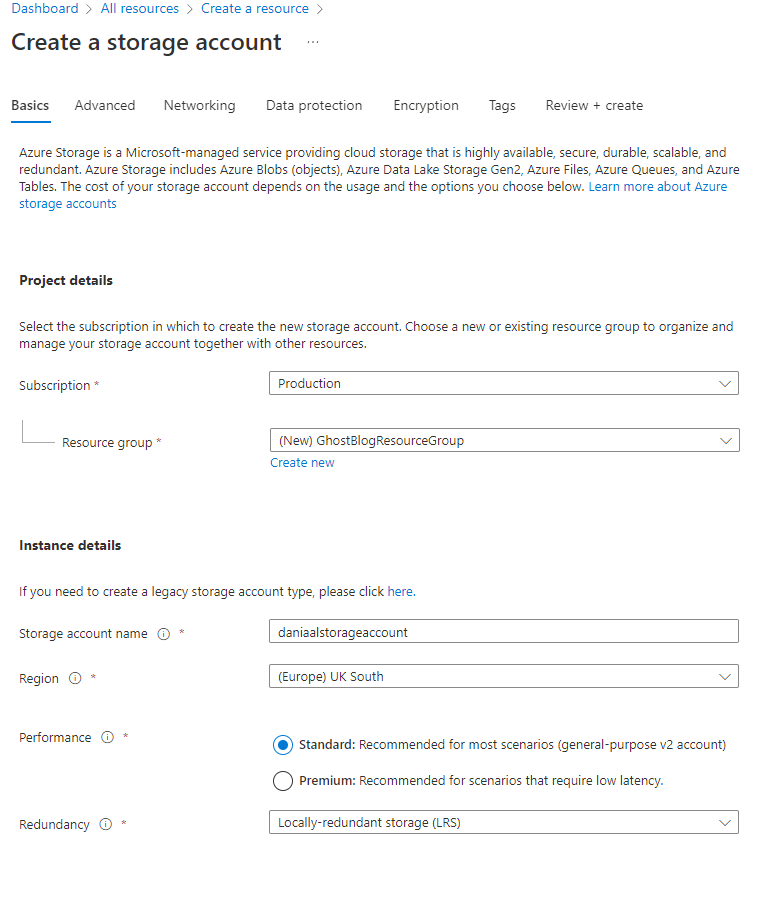
2. Azure Storage Account. Next we need to create a Storage Account. This is where the images will be stored when we upload them when creating blog posts. When creating the storage account, you can set the redundancy to whatever you like, i have set mine to LRS. I only configured properties in the Basics tab. Again, configure it how you like because we just need a storage account. When configured, click "Review + Create".
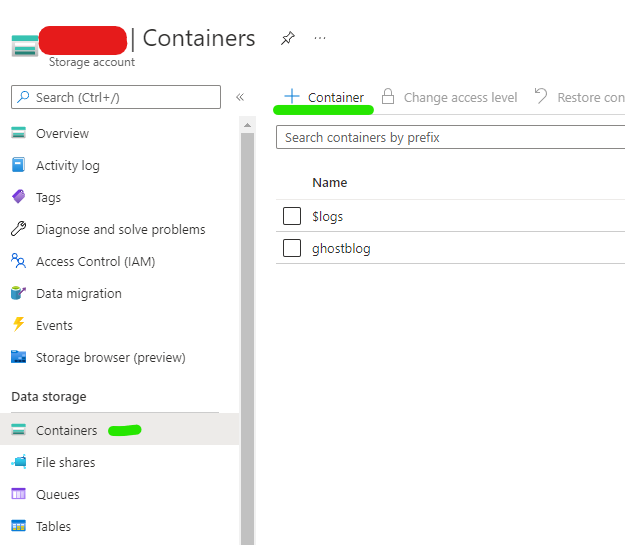
Whilst we are here, we need to create a container. You will be able to do this once the storage account has been deployed. Create your container. I called mine "ghostblog".
Ok, we are done here. All the necessary resources have been deployed and we can now get to deploying Ghost to a docker.
Ghost Configurations
We need to deploy our Ghost blog to an Image Registry but first need to do a few things. I have setup a repository on GitHub that you will need to clone so that you can add your own configuration variables, such as the database, storage and email configuration. Side note, you can also modify them theme however you like but more on that later.
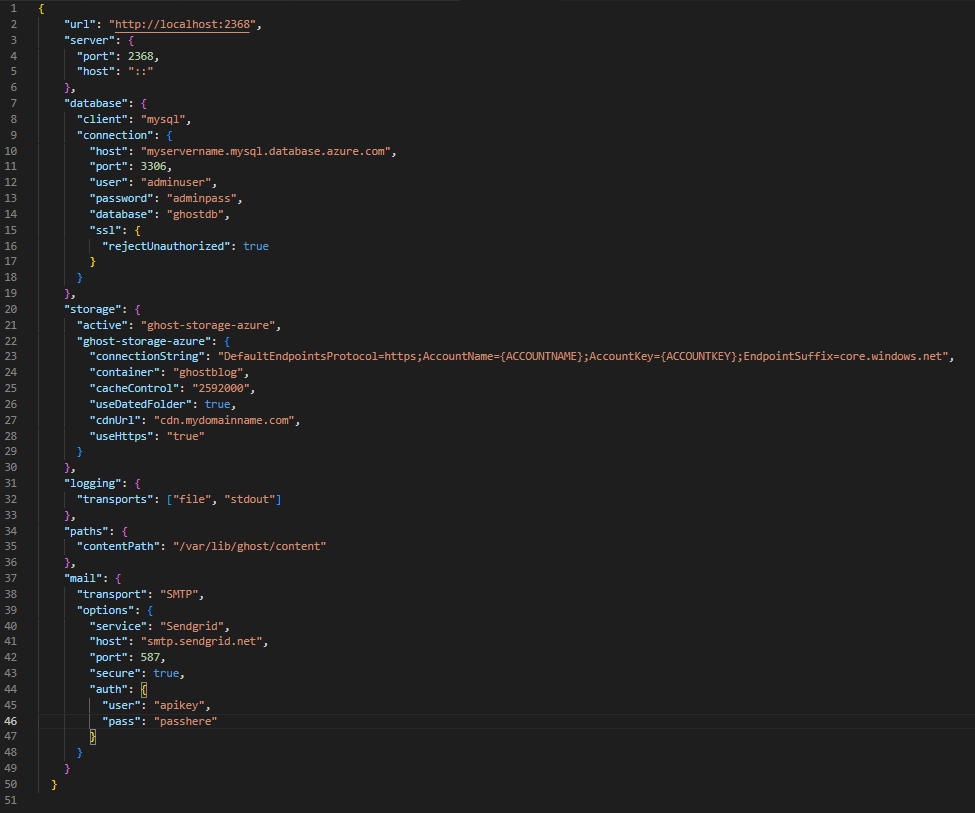
Once you have cloned the repo, navigate to the config.development.json file and in here plug in your configurations. The resulting file should look something like the below. IMPORTANT, you will see that we have cdnUrl in the "storage" section. For now replace the "mydomainname" with a domain name that you have.
For the mail section, I am using SendGrid. If you want to use SendGrid, you will need to generate an API Key. To do this, go to Settings -> API Keys -> Click "Create API Key" in the top right -> Give it restricted access -> Go to "Mail Send" and turn on "Mail Send". This is the only permission you will need. Side note, SendGrid required you to verify your domains by adding CNAME records to your DNS records, so make sure you do this.
And that's all you need to do with your configuration file. Ok, next we need to populate the Disqus URL. Go to post.hbs and you will see a section that looks like the below.
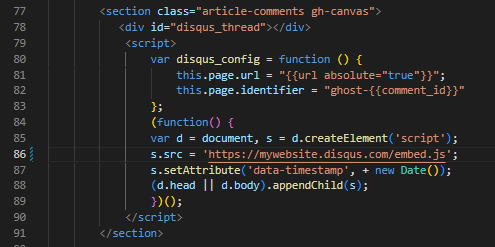
You need to sign up to Disqus and create a site. Once you have created your site, you will see a setting called "Short Name". Replace "mywebsite" with the short name.
That's it, you are now fully set up in the front end. Next we need to build and deploy our docker image.
Deploying Ghost
Now we need to build and push Ghost. We are going to push our image to the Docker Hub registry. You get 1 free private image that you can host on Docker Hub. You can of course push to any other image registry if you like. You can of course use any other image registry if you like.
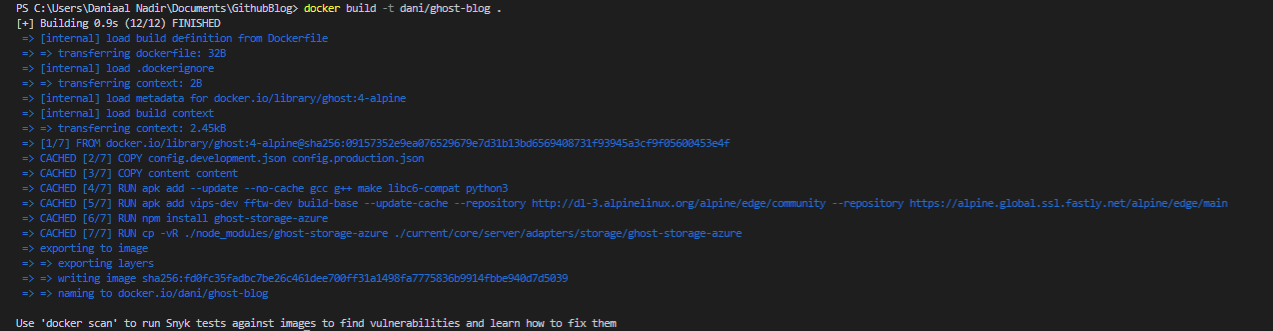
Ok, in VS code, open up the terminal. There is a menu item at the top that says terminal. Run the command below.
docker build -t myname/ghost-blog .Once you run that, your output should look like the below.
Next run "docker login". I was already logged in so the output for me looked like the below.

Ok so now we need to push our image. Run the below command.
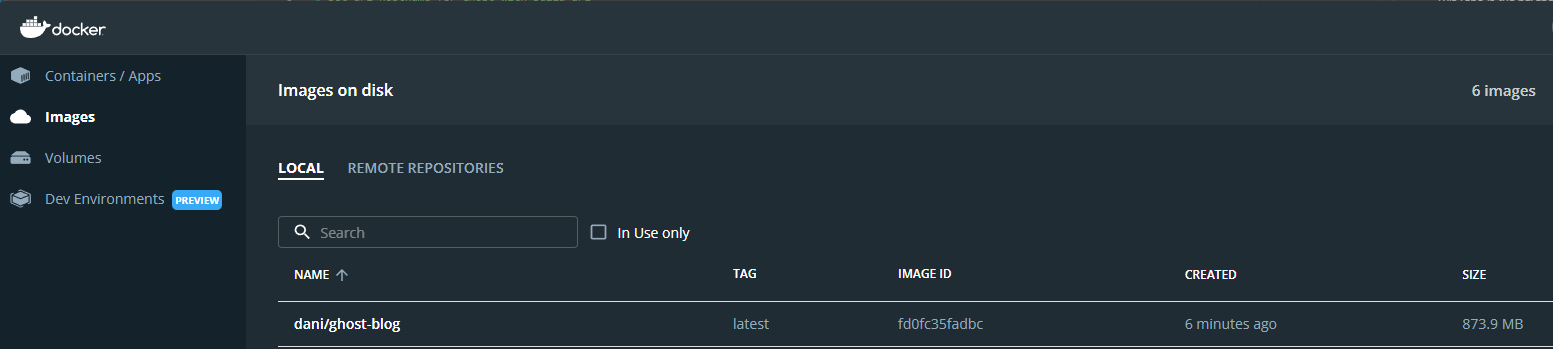
docker push myname/ghost-blogThis will push our image that we build to docker hub. The name of the image is what you called the image when you built it. You can view your built images on the Docker desktop app.
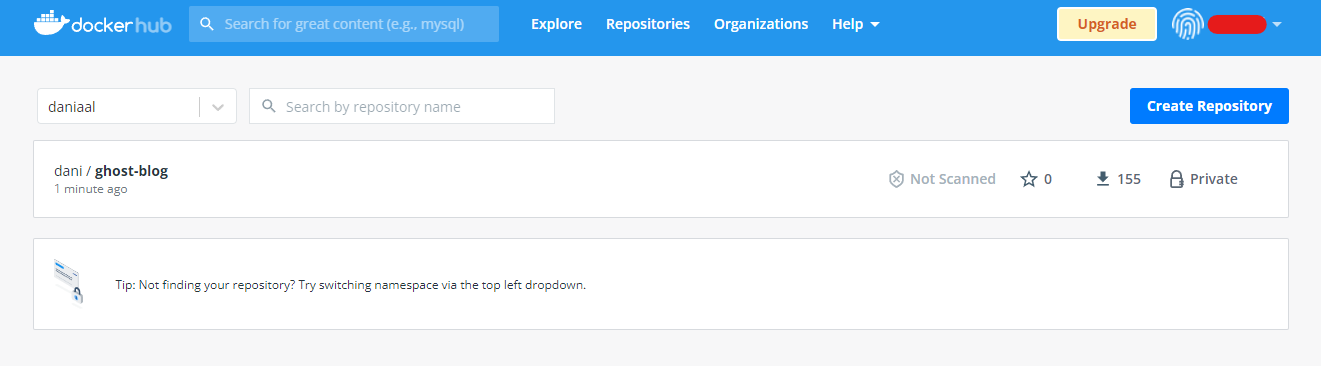
Ok so now if you go to https://hub.docker.com/ and view your repositories, you should see your pushed image. Next we need to configure our Azure web app to use the image.
Deploy Image to Web App
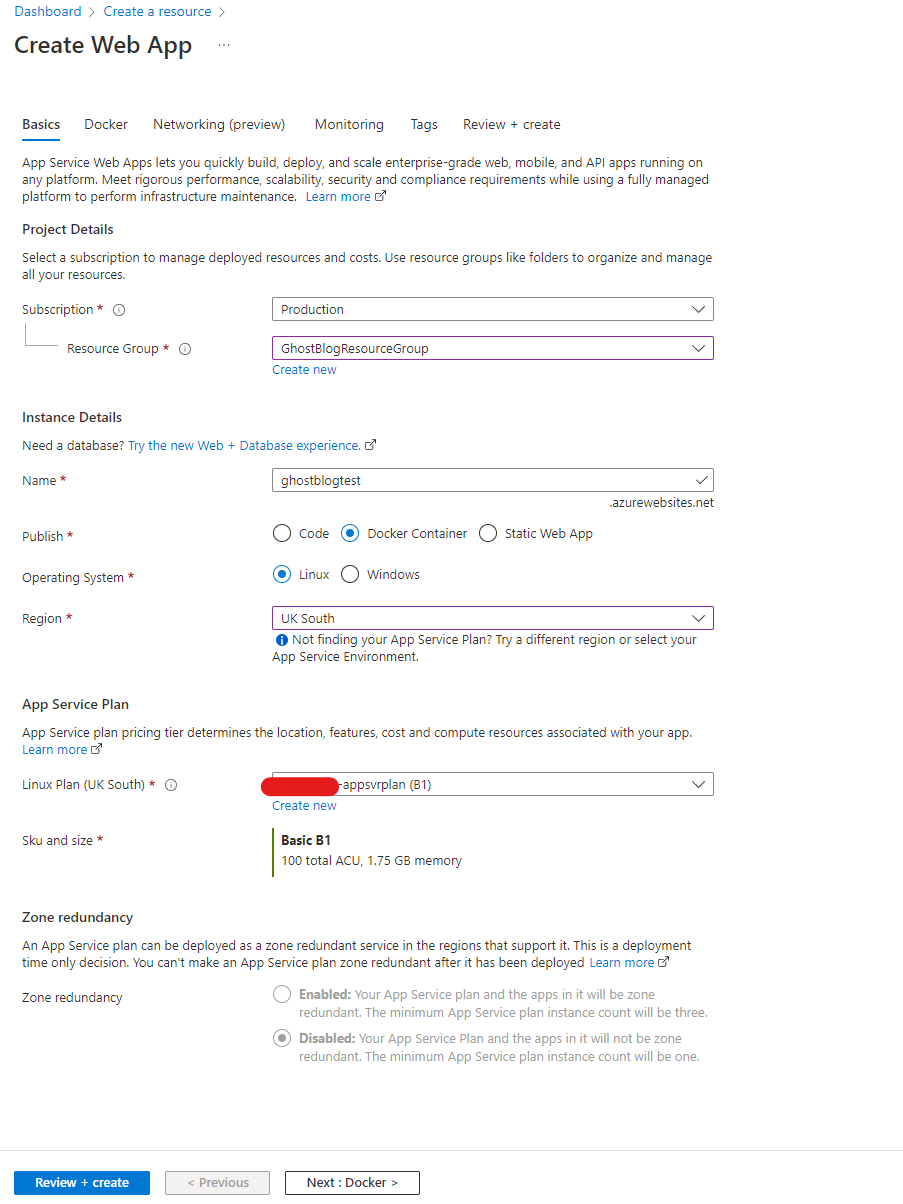
Okay so now we have done most of the hard work and now we need to deploy the web app. First create the resource in Azure
- Make sure you set the stack to Node 16
- Select "Docker Container" as your publish method.
- If you haven't already, create an App Service Plan, make sure it's a Linux Server and select B1 as the SKU. This will cost you £10 but you can host multiple web apps on this and it allows you to configure a custom domain.
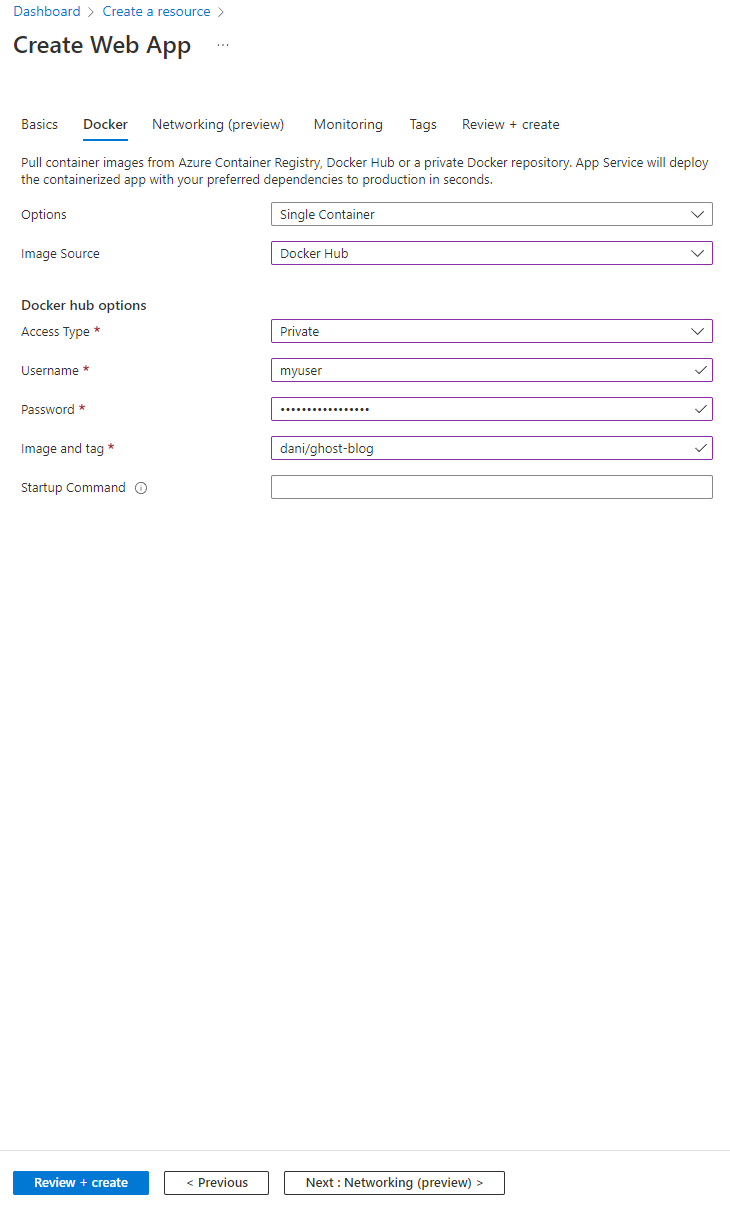
Next click the "Docker" tab and populate your docker credentials.
Next, click "Review and Create". After this, you need to add your custom domain to your web app. The below is important so make sure you follow this.
- Go to the custom domains section and add your custom domain. You can chose two methods to get this working, by either adding a CNAME and TXT record or A and TXT record.
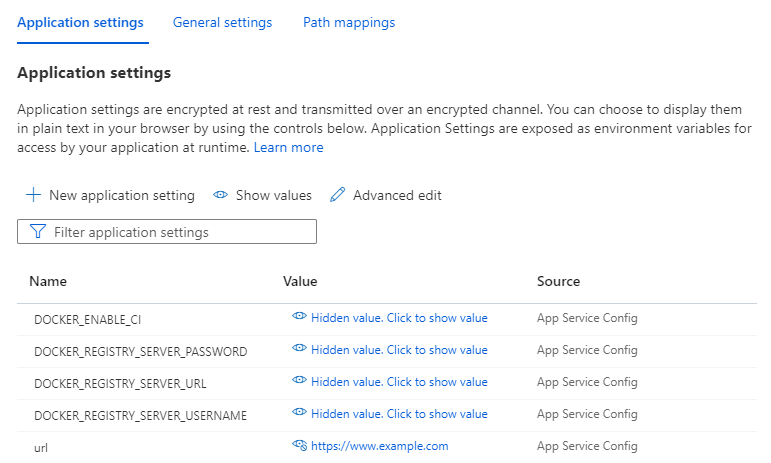
- Once that's done, go to your configuration and add a configuration called "url" and set that to your custom domain. See below for further clarification.
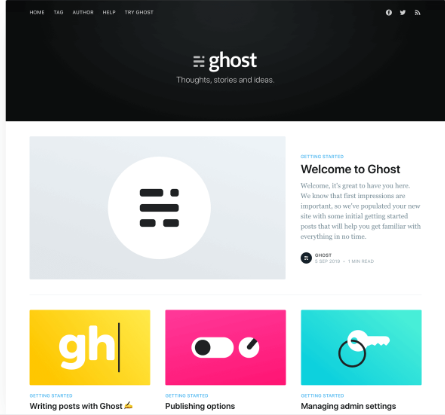
Now if you navigate to your site it should look something like the below.
We are not done yet though, we need to do one more thing. Setting up the CDN. FYI, if you create a post and upload an image, you will notice that it is using your CDN URL, however we have not configured that yet so the image will not be resolved.
Content Delivery Network
For our CDN we are going to use Cloudflare. There are other options so as Azure CDN and they have a few different providers such as Akami, Verizon and Microsoft themselves but they cost and we are after a low cost solution and Cloudflare fits this perfectly.
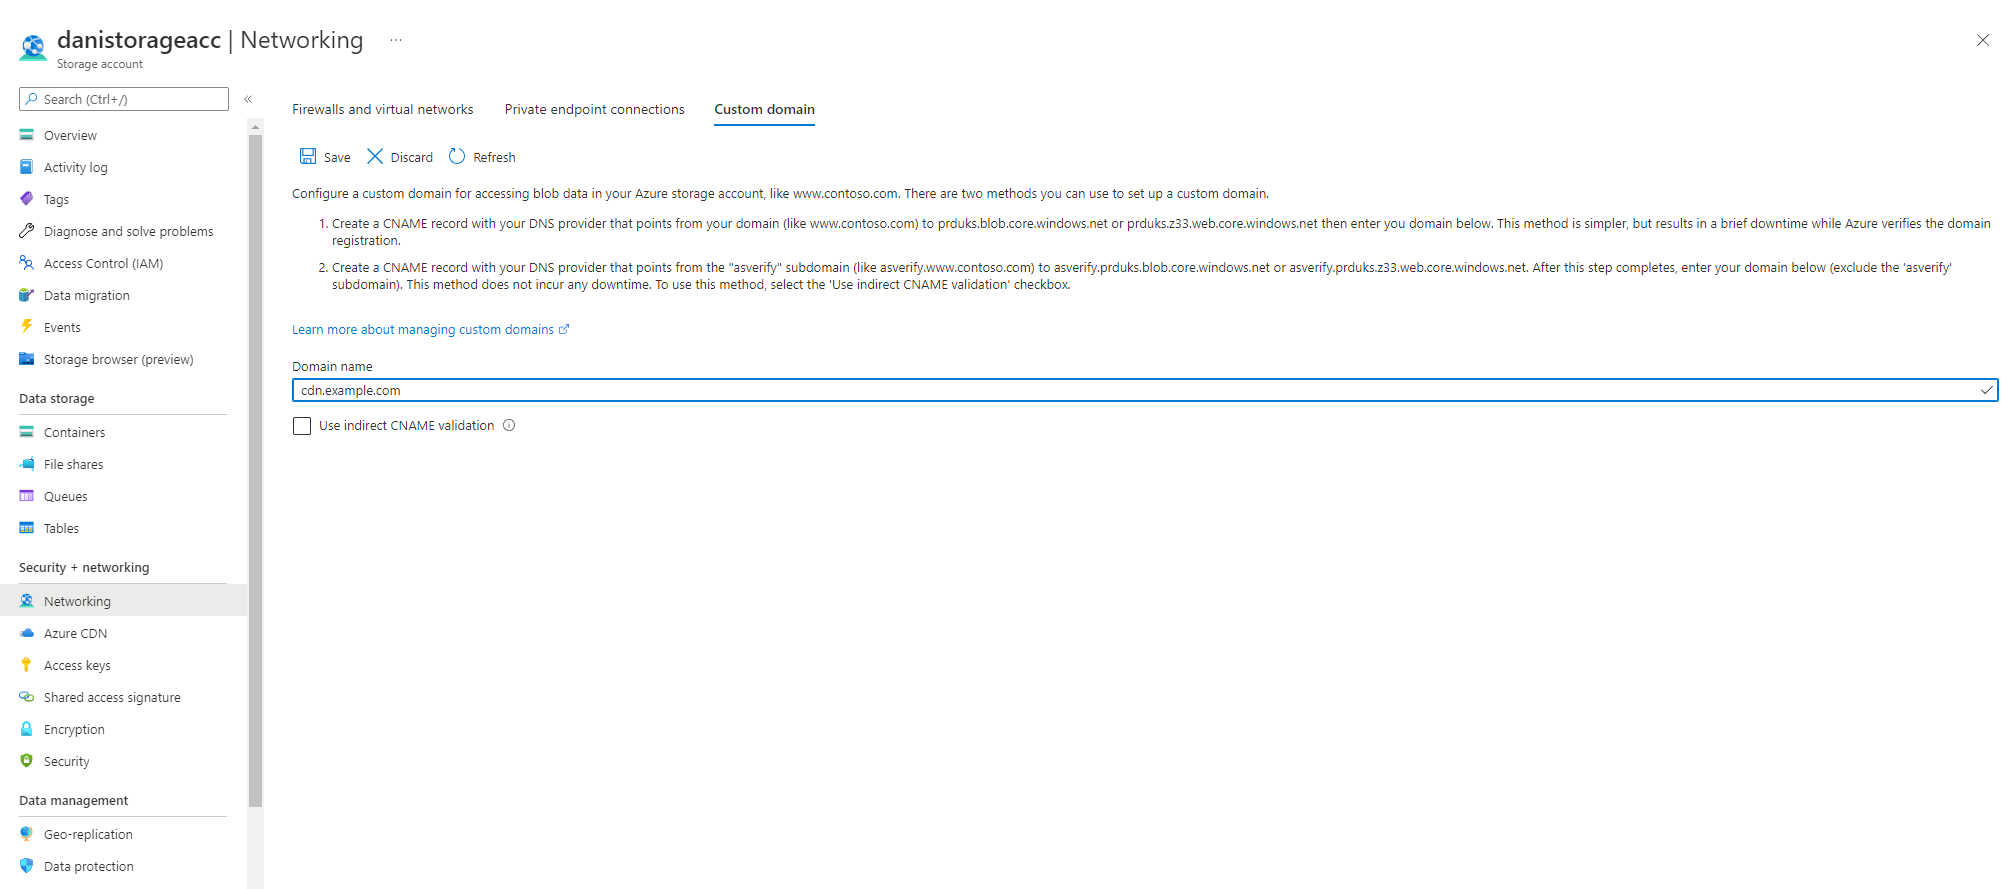
Go to your Storage Account then to Networking and then in the "Domain Name" textbox, enter the subdomain or domain you would like for your CDN. I just called mine CDN.example.com but you can call it anything you want. Now we need to verify this but we need to add a CNAME record to Cloudflare first.
Now, head over to Cloudflare, go to your DNS settings and create a CNAME record, with the name as CDN and the target as the URL of your blob storage account that you copied earlier. See the image below. Make sure that the Proxy Status is off and then click Save. We will enable this later but we need to disable the Proxy Status so that Azure can verify that we have added the record.

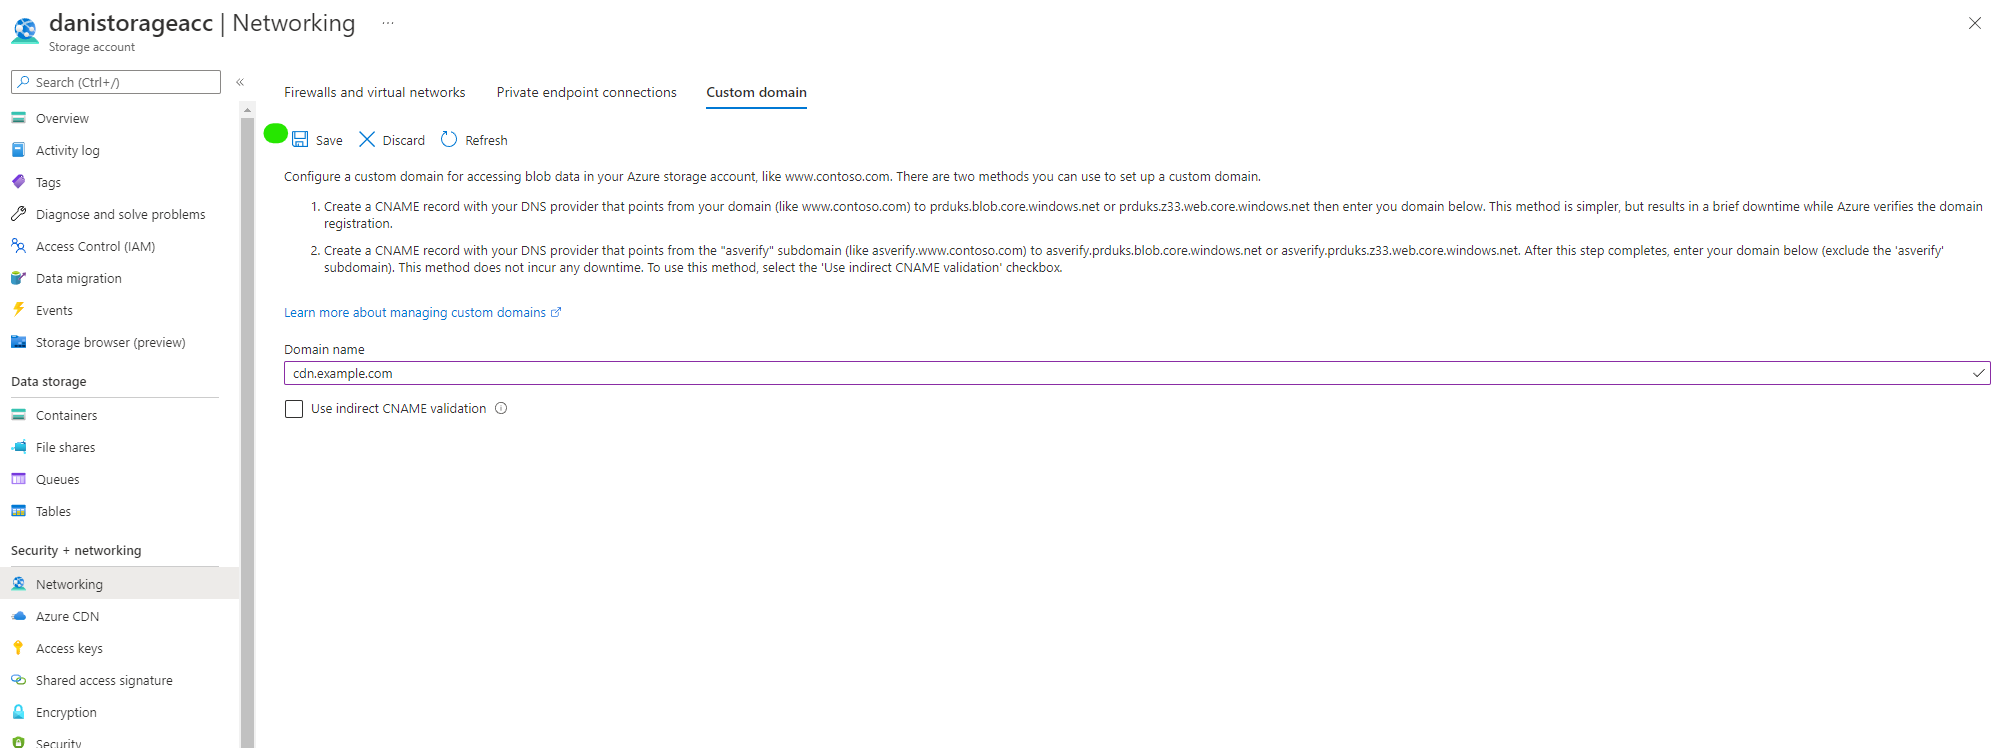
Next, go to Azure and click "Save". It may take a few mins for your DNS records to update but it's normally instant.
Once the domain is verified, go back to Cloudflare and turn on the Proxy Status and it should turn orange. Now click "Save".

Congratulations, you finally made it! You should now have a fully up and running blog and if you create a blog post, upload an image, and save then navigate to your blog post and inspect element, you will see that it's resolving through to your custom domain.

If you have any issues getting setup, leave a comment below and I will try my best to help you out. All of this works as of 26/04/2022 and I will make sure to update the GitHub project to the latest version of Ghost blog as it comes out.
As a final note, my goal is to create a YouTube video as this will make the process much more clear. But in the mean time, I hope that this blog post helped you.
 daniaalnadir