Protect your server with fail2ban and nginx

I use nginx to redirect requests from my domain to a service that I self host. It works perfectly however I wanted a mechanism to keep bad actors away from my server and keep my security posture in tip top condition.
fail2ban is a service that will ban IP addresses conducting too many failed login attempts. For example, the service will read the access log file for nginx and if it spots a malicious actor, the IP address will be added to a ban list for a period of time. You can further configure fail2ban to send you notifications via different channels and for this example I am going to use discord.
First install fail2ban. Once installed fail2ban will setup a background service however it is disabled by default.
sudo apt update
sudo apt install fail2ban
To view the status of fail2ban run the below command
systemctl status fail2ban
The configuration for fail2ban is rather simple. There is a jail.conf file that has some standard configuration but we don't want to edit this. Instead we will create a jail.local file. This file will take precedent when the configuration is loaded by the service.
nano /etc/fail2ban/jail.localCreate a new jail.local file
Once the jail.local file has been created, paste the below into it for an nginx configuration. There are multiple blocks and each blow will look for certain properties assigned to the filter property. If the threshold is met, the IP address will be added to the ban list.
[DEFAULT]
bantime = 3600
findtime = 600
maxretry = 5
action = discord

[nginx-http-auth]
enabled = true
port = http,https
filter = nginx-http-auth
logpath = %(nginx_error_log)s
maxretry = 5

[nginx-limit-req]
enabled = true
port = http,https
filter = nginx-limit-req
logpath = %(nginx_error_log)s
maxretry = 5

[nginx-botsearch]
enabled = true
port = http,https
filter = nginx-botsearch
logpath = %(nginx_access_log)s
maxretry = 2

[nginx-bad-request]
enabled = true
port = http,https
filter = nginx-bad-request
logpath = %(nginx_access_log)s
maxretry = 6
Save this and then start fail2ban and the service should run without errors.
sudo systemctl start fail2banTo make sure fail2ban runs on the restart of the LXC or server, run the below.
systemctl enable fail2banSetting up alerts to discord
Create a new file running the below command where we can configure the discord webhook URL. You can get this URL from a discord channel > Integrations > Webhooks and copy the webhook URL.
nano /etc/fail2ban/action.d/discord.confAdd the below to the file and replace <webhook_url> with the URL you just copied from discord. You can edit the content to whatever you like but I have just keep it simple here.
[Definition]
actionban = curl -X POST <webhook_url> \
-H 'Content-Type: application/json' \
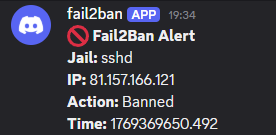
-d '{"content": "🚫 **Fail2Ban Alert**\n**Jail:** <name>\n**IP:** <ip>\n**Action:** Banned\n**Time:** <time>"}'
actionunban = curl -X POST <webhook_url> \
-H 'Content-Type: application/json' \
-d '{"content": "✅ **Fail2Ban Alert**\n**Jail:** <name>\n**IP:** <ip>\n**Action:** Unbanned\n**Time:** <time>"}'Now restart fail2ban to make sure the config is reloaded.
sudo systemctl restart fail2banGreat! You have configured your server to be safer from bad actors.
To test that the notification system works, you can add an IP address to the ban list. You can use a random IP address but make sure to unban the IP to keep the list clean.
## Ban
fail2ban-client set sshd banip <your-ip>

## Unban
sudo fail2ban-client set sshd unbanip <your-ip>
You should get an alert like the below in your discord channel.
Notes
I had to add backend = systemd to the sshd file in the jail.conf file so that the fail2ban service would run.